The previous owner had ridden this bike hard, so the paint was quite rough when I got it.


Often when I buy a bike with rough paint, I'm able to rejuvenate it with a mild abrasive wash and a polishing. You'd be surprised what's possible with this simple method. This bike, though, was just too far gone. Even after cleaning it up as much as possible, it still looked like hell:


First order of business, then: a fresh powder coat. After some consideration, I settled on sage green as my color of choice. I had in mind something like this ANT bike. Unfortunately, that color wasn't available at my local powder coater, Melrose Metal Finishing. Much to their credit, they offered to special order a small amount of the next closest shade for a reasonable charge. (This is particularly impressive considering that this was only a very small job compared to their usual fare.) Nonetheless, picking a color from a small swatch on a computer screen is dicey business and I learned the just how dicey when I picked up the freshly powdered frame:

My initial color ideas (silver housing, cream tires, dark brown saddle, all silver brake levers) went out the door and through a combination of happenstance and deliberation I settled on: light brown housing, tanwall tires, honey-colored saddle and bar wrap, bars that are halfway between the classic porteur shape and the north roads style (VO Belleville), a tall positive-rise stem, French stem shifters, and inverse brake levers with gum-colored bodies. As usual, I favored silver over black components, but after scoring some very nice Campy-Mavic wheels, I opened up to the possibility of grey rims on the this build. I think the dark grey anodizing contrasts nicely with the frame color.

The VO Porteur rack was sort of the impetus for this build. I've long admired it's design so it was a pleasure to actually handle one. Of all the modern porteur racks that I've seen (Soma, Cetma, Gamoh, Pass & Stow), I think this one looks the best. It remains to be seen how well built it is, but I'm optimistic.


The tall stem puts the bars higher up and closer than is traditional on this sort of bike, but I thought that the resulting upright-ish posture would be appreciated by the average urban rider. From what I understand, the French newspaper delivery men who engendered the porteur bike were highly competitive, so it makes sense that they would have favored a more low, aerodynamic riding stance. For regular folks, though, upright makes sense for city riding.


My initial plan was to wrap the bars all the way up to the VO insignia to allow for more padded hand positions, but I compromised to be able to use this honey-colored wrap, which I had already pre-cut with another use in mind. Anyway, I figure that if one wanted to, one could still place the hands farther forward or closer to the stem on the bare bars (as long as it's not too cold out!). I've done this before for fairly long distances on my Soma Oxford bars with no trouble.
A warning to those installing these Dia-Compe inverse levers: be sure to abrade the inside and outside of the little metal "shim" that goes between the bar plug and the inside of the bar, and grease the threads on the fixing bolt to allow a little extra torque. Otherwise, you'll probably find it impossible to install the levers tightly enough to resist twisting. It's not the best design--I much prefer the expanding plugs that came on Suntour barcons and that are still used on other bar-end shifters and levers--but, with a little extra care, it seems to work well enough.

The Brooks B-17 Special saddle is still up for debate. It fits right in aesthetically but I'm not sure it's comfortable enough with the bars mounted so much higher than it. I may spring for a sprung saddle. We'll see.

It's worth noting that in addition to the obvious cockpit alteration, almost all of the 210's original parts got upgraded. These crank arms came from my '88 Miyata 615. In order to restore their look, I removed the worn anodizing and polished the aluminum to a satiny finish. The previous owner had ridden almost exclusively in the middle chainring, so I replaced it with a nearly new one of the same size (44T). The original pedals were lost to time, so I chose to go with these street-shoe friendly MKS touring pedals.

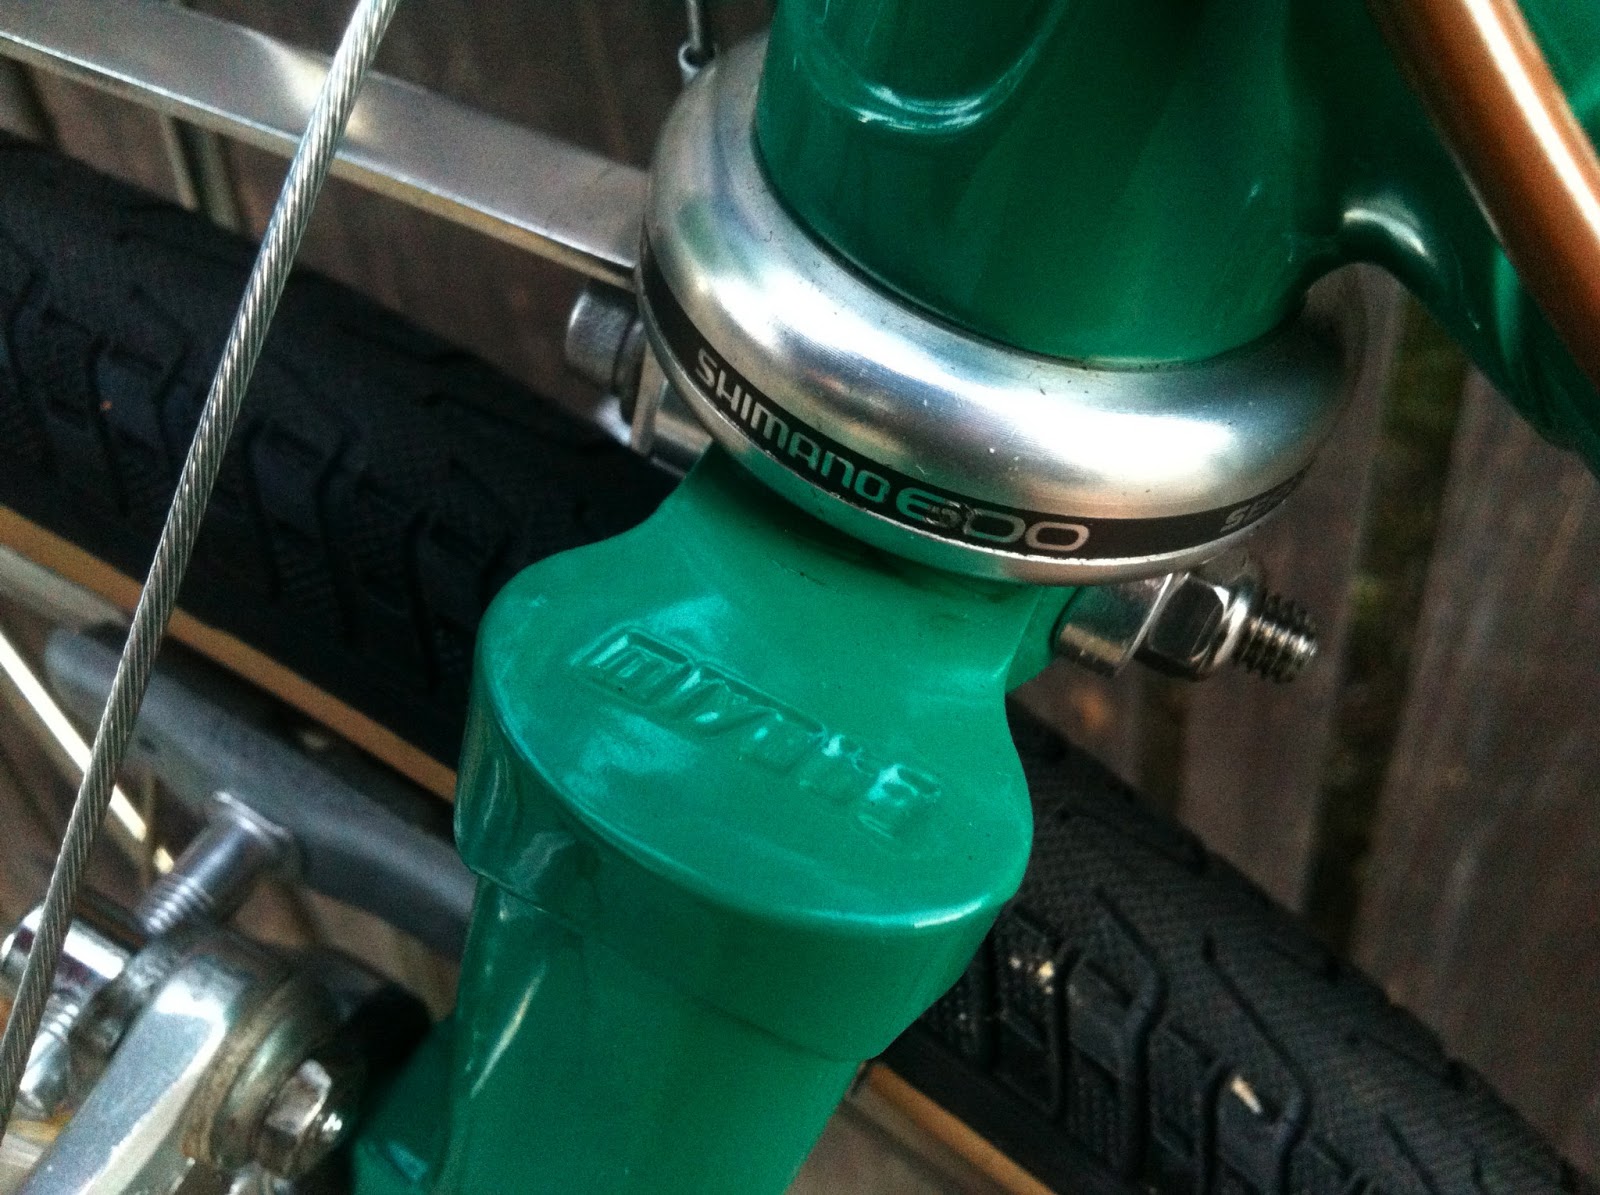
The headset had been upgraded by the previous owner to a well sealed Shimano 600 model, still in very good shape.
My second favorite bit on this build (after the porteur rack) is probably the silky smooth 36H Campy Record hubs. I suppose they're overkill here, but I got a good deal on them and with the Mavic G40 rims, they make for a bombproof wheel set that shouldn't require frequent maintenance.


Even with 35mm tires, there's still plenty of room for fenders.

The original Light Action derailleurs are, along with the seatpost, the only original components. The derailleurs got a thorough cleaning and re-greasing. With a new Shimano ramped freewheel, new chain, lined housing and slick stainless cable, the friction shifting system is as crisp as any I've used. The ratcheting Simplex shifters probably contribute further to a feeling of precision.


The final touch: a hand-fashioned chainstay protector to match the grips.


i really think that this is a classy bike..... too bad this is a little out of my reach
ReplyDeleteThat's what credit cards are for! Or did you mean physical reach? ;-)
DeleteLovely build Andre. I've seen a few others you've done and have a Trek 400 Elance begging for a similar makeover. I agree, I'd go with a Brooks sprung saddle with that upright ride.
ReplyDeleteThank you, Elia. Well, let me know if you want help with that Elance project. I used to ride a very similar Trek 500 Tri-Series frame and loved it. Great ride quality.
DeleteMy Trek isn't even in bad shape. The paint is in great condition and its got great Shimano 600 components. I'm trying to feminize it a bit, if that makes sense. It could use a bit of cork, cloth, and/or leather to soften it up and I'd love to get some fenders on it.
DeleteNice job on the rebuild. I especially like the color! On a repaint like this one you might want to use the "Resurrectio" decals from Rivendell unless of course you can find some originals. http://www.rivbike.com/product-p/m11.htm
ReplyDeleteGreat job. Where did you find the stem shifters?
ReplyDeleteKiller bike, man! Thanks for sharing as it gave me a smile. :)
ReplyDelete